
A very lovely fellow potter gave me a recipe for a white glaze called ‘Neil Hayes 1’, as pictured below.
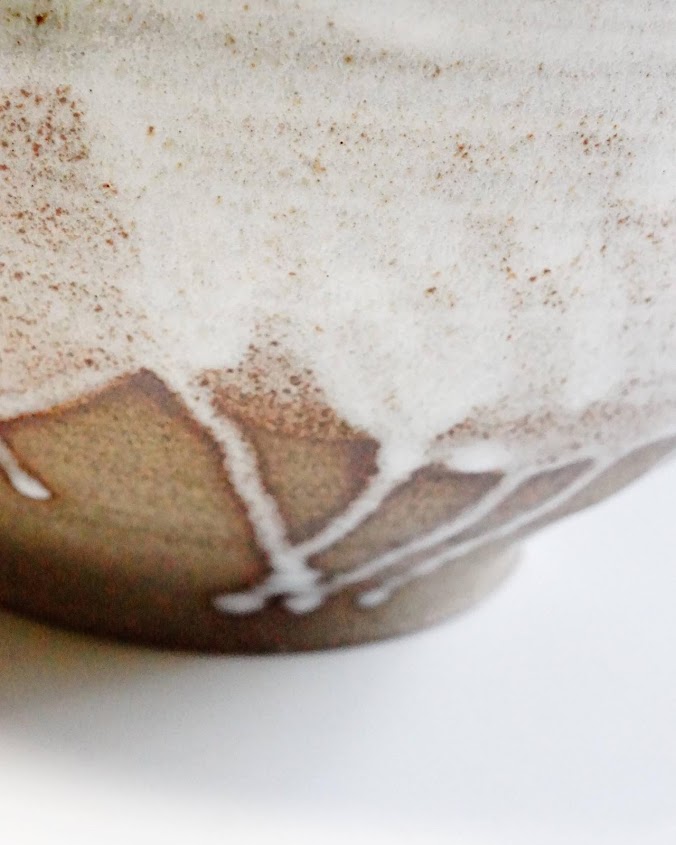
It’s a lovely glaze but included an ingredient I hadn’t used before – bone ash.
You can find a huge variety of glaze recipes using bone ash on Glazy.

According to Wikipedia:
Bone ash is a white material produced by the calcination of bones. Typical bone ash consists of about 55.82% calcium oxide, 42.39% phosphorus pentoxide, and 1.79% water. The exact composition of these compounds varies depending upon the type of bones being used, but generally the formula for bone ash is: Ca5(OH)(PO4)3. Bone ash usually has a density around 3.10 g/mL and a melting point of 1670 °C (3038 °F). Most bones retain their cellular structure through calcination.
You can read more about bone ash as a glaze material on Glazy.
Let’s not support factory farming
I don’t need to go into all the details of why factory farming is bad here, but if you want to learn more, check out the Humane League for info on why factory farming is bad for animals, people, and the environment.
You can also read about and support SAFE’s work in NZ.
I tried enquiring at my usual suppliers (CCG, Nelson Pottery Supplies) to find out where their bone ash was from. All they could tell me was that the bone ash was imported from the UK. Some suppliers also sell synthetic bone ash, which is also imported from overseas.
We have plenty of bones here in New Zealand so I started looking into how hard it would be to make myself.
I know cattle are raised as grass-fed and free range animals in New Zealand as I have seen on my in-laws farm, so I felt comfortable about buying bones from my local Halal butcher shop.

There was not a lot of information online, so I asked on my local pottery group’s Facebook page. I didn’t get responses from anyone who had done it, but I did get some general suggestions.
To calcine materials you usually need to fire to a bisque temperature. So I understood what I needed to do was easy enough – get some bones, put them through a bisque firing in my kiln, and grind them up.
Ultimately I decided to just experiment and see what would happen if I made my own bone ash, and made the glaze above with it, and I’m pretty happy with the results! Bonus you get homemade bone broth!
My process
So the steps that I took in order were:
- I went to my local butcher shop and bought 5 kg of cattle bones for $7. You could also use sheep or pig bones and likely get similar results.
- I simmered the bones for about 5 hours in 10L of water to make bone broth. The longer you boil them the more soft tissue will break down. You could also put them in a slow cooker for 8 or 10 hours. I would avoid the temptation to add seasonings or other materials such as salt because that could leave a residue on the bones that might effect the calcining, but I don’t know for sure.
- Strain the liquid out. After you have removed the bones you can season the liquid and add whatever you like to it to make into soup. It makes a particularly nice base for Vietnamese pho.
- Dry the bones, removing as much meat, cartilage etc as possible (you can put that in the soup).
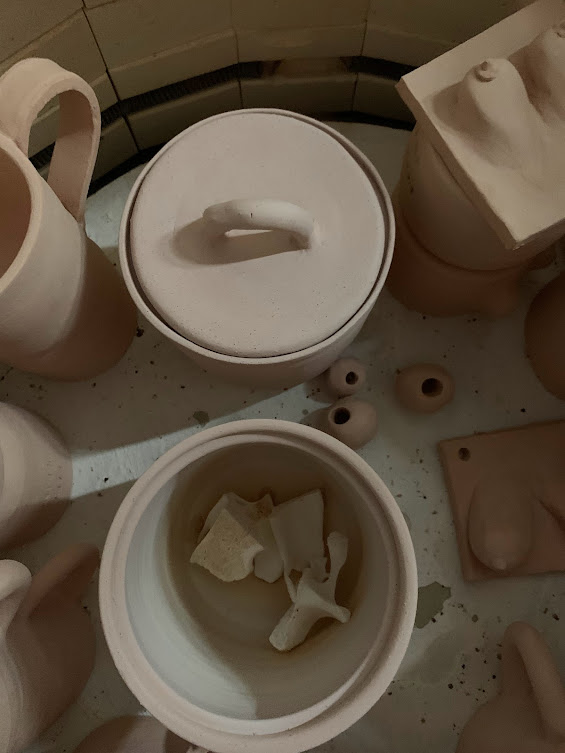
- Put the bones in a saggar of some kind – you could use a greenware bowl with a plate on top or a lidded jar. Be aware that the bones can leave some residue in the saggar so don’t use your most precious piece. You can still glaze & fire the saggar after but I did notice a bit of discolouration and darker area where the bones had been in the bottom of my lidded vessel.
- Load kiln and run a regular bisque fire programme. My programme is a very slow ramp of about 30 C / hour to 70 C, hold for 40 mins, then ramp a bit higher to 900 C, and a natural cool, but you could probably use whatever programme you normally use. As long as it’s a bisque programme with a slow ramp I don’t think you would need to worry about any exploding bones.
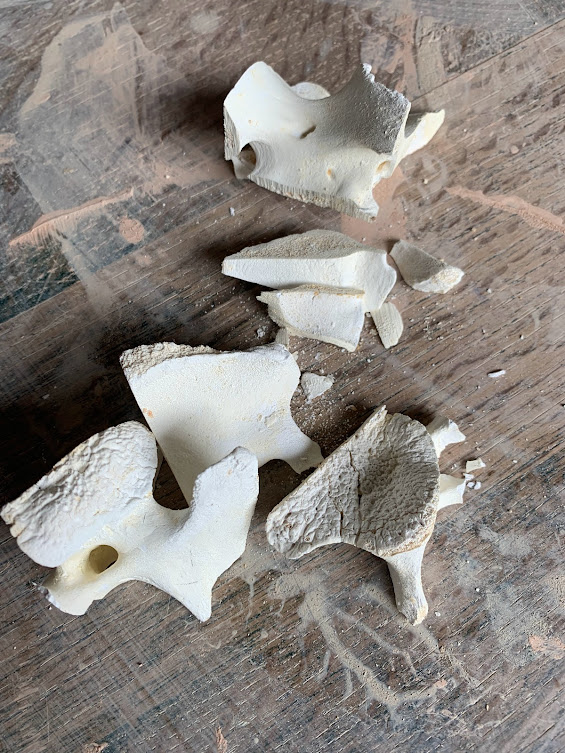
- Unload the kiln and remove the saggar & bones. They will now be bright white and brittle and all organise material will have burned away. (See above – saggar may have some discolouration)
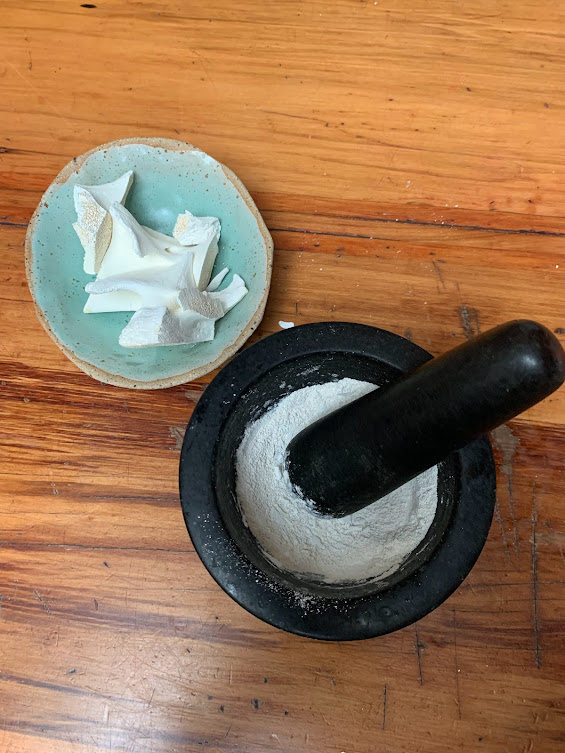
- Grind up the bones with a mortar and pestle – or I used my BlendTec blender (Witchy but make it modern).
- Mix up your glaze following your recipe of choice. If you have a ball mill it probably wouldn’t hurt to mill the glaze to break up any larger chunks of bone but I don’t have one and it still turned out ok.
- Make sure you sieve your glaze after it is made up 🙂
Some photos of the process:
So that is how I made my own bone ash! It’s really easy and it feels really great to be able to use locally sourced materials in my glazes 🙂
6 responses to “How to make bone ash for pottery glazes”
Thank you so much for sharing your process! I’m going to try it out myself with some bones from an organic farmer. I’ve been eyeing those pretty khaki glazes, but didn’t want to buy regular bone ash. But this gives new possibilities!
Ha, bones from cows. Not the farmer himself 😛
LOL!!!
I’m hoping to do this with my pet cat who was killed yesterday (obviously will be skipping the broth part), we’re going to bury her for a few weeks first so the soft tissue decomposes, then leave the bones to dry in the sun.
What cone did you fire to in the end?
I successfully bisqued some cow bones to cone 04 and ended up with nice 80 mesh bone ash, thanks for the tips! This was the only guide on the internet that I could find for this technique.
I would consider a couple things before attempting again: my kiln produced a ton of smoke throughout the 600-800 Farenheit range which was a challenge for my not-quite-adequate ventilator. I ended up needing to open all the doors/windows in the kiln room and re-insulating the exhaust port – it was a bit alarming but ended up working fine.
Also, the smashing and grinding w/ mortar and pestle can take hours, so be prepared to put in a lot or work or accept low yield if you want a really fine powder. The blender & ball mill helped but didn’t really seem to break up the big chunks.
Wow thanks Chandler, smoke is a bit concerning! I didn’t notice any smoke from my bisque but I only did a small amount of bones. Hopefully didn’t do any damage to your elements!